Have you always wanted to start a garden but don’t have a big backyard or workable space? Raised bed gardening is a great activity for beginners who want to learn to grow their own food source. You don’t have to have a big yard or a lot of land if you put in raised beds and grow vertically. Building a raised bed garden is easier than you think, especially if you follow some tips below.
What is a Raised Garden Bed?
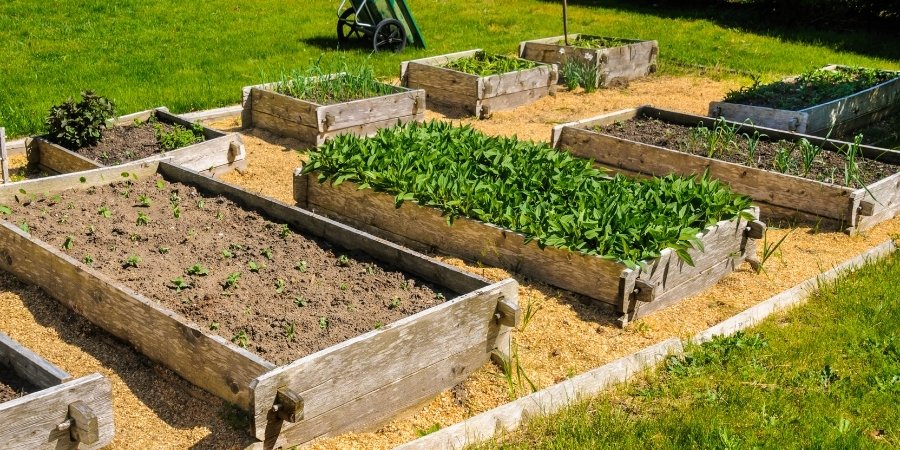
Raised bed gardening is simply growing plants in raised beds filled with soil instead of directly in the ground. There are many benefits to using raised beds over traditional row gardening: It is better for people with disabilities or injuries that make bending and kneeling difficult, it’s easier to control the soil medium, easier to weed, and often movable.
When planning your raised bed, consider how much space you need for plants and how many plants you want to grow in each bed. A typical garden bed should be about 4′ wide x 8′ long x 2′ deep. You can make yours smaller or larger depending on your needs and available space. You can plant vegetables, flowers, or both! Just make sure the spot you choose gets ample sun for what you are growing.
Common materials for constructing garden beds:
- Wooden boxes
- Galvanized metal tubs
- Plastic totes
- Recycled tires
- PVC pipe and canvas
- Reclaimed wooden pallets
- Kiddie pools
- Anything capable of holding soil and draining water.
How to Start a Raised Garden Bed
Raised garden beds are an excellent option for people who want to grow vegetables and herbs but don’t have enough space for a traditional garden. This is also a good option for those who live in a rented space and can’t alter the property (dig up the yard).
Materials You Will Need To Build A Raised Garden Bed:
- Your chosen building materials or tubs
- Potting soil
- Compost
- Peat moss or other organic material (grass clippings, leaves, etc.)
- Starter plants or seeds
- Watering can or hose
- Measuring tape
- Small hand tools like a little shovel
Step 1. Measure Your Space
Measure the area you would like to use for your raised bed garden and make sure that there is enough room to walk around it. The outer edge of the raised bed should be at least 3 feet away from any structure like a house or a fence. The spot you choose should get at least 6 hours of sunshine per day.
Step 2. Build or Place Your Containers
Your gardening beds can be made out of practically any material that can hold soil and plants. Be advised that although wood is an ideal building material, it does rot over time and will need to be replaced. A better option might be to use the galvanized tubs or build using stones, rocks, bricks, or cinder blocks. Another option you might see often is recycled tires and apple barrels.
Step 3. Add Material to the Bottom of Your Beds
In general, raised vegetable beds should be 8 to 12 inches deep, but they can be deeper if you have mobility problems or if the soil lacks drainage. At the bottom of your garden bed, add organic material such as sticks, leaves, wood chips, and straw to reach ⅓ full. Then add your potting soil and compost mix or peat moss to fill up the rest of the space.
Step 4. Decide What to Grow and Plant Your Seeds
Next is choosing what plants you want to grow in your raised garden bed. Some common choices include tomatoes, peppers, lettuce, and cucumbers; however, there are many other options! Whatever your heart desires.
Planting is done by putting seeds or already started plants into the soil. Follow the instructions on the tag or seed packet. If it’s still early in the season, you can plant each seed individually, but if it’s later in the season and your plants are growing taller than expected, you may want to plant them in groups rather than individually.
Step 5. Give Them Some Water
Watering your plants is an important part of keeping them alive. You should check your plants at least twice a week and water them if they need it. The plants need more water on extra hot sunny days. It shouldn’t be dry if you put your finger in the soil. Ensure that when you water your plants, you do so at night or early morning so that the leaves dry off before evening when the sun sets.
Don’t forget to add fertilizer once every month during the spring and summer seasons (March through September).
If you plan on doing a serious amount of gardening, you may want to build your beds out of materials that will look nice and last a long time. However, if you are looking to have a small herb or veggie patch in your backyard, it is a simple and affordable way to do so.
While you get your garden set up, you should also consider getting the rest of your yard and property ready for the season. Dirt, mold, mildew, cobwebs, and other stains negatively impact the appearance of your home, deck, walkway, driveway, or patio. With extensive training and the use of low-pressure nozzles, Squeegee Squad’s professional cleaners can remove these unsightly stains without damaging delicate surfaces like stucco and painted facades.
Contact Squeegee Squad for more information about pressure washing!